Update (April 2020): Please note that the Wrike team strongly recommmend using the BI Export functionality that provides a better experience than a manual query writing in the Power BI. Also, please be aware that API requests samples used in this article are taken from Wrike's API v3, while the current version is API v4. You can find the relevant API requests samples in our documentation.
This article requires a basic understanding of the security requirements and limitations of Wrike’s API – please read more about Wrike's API authorization here and in this API Community post.
Preface
Microsoft Excel is a popular solution for organizing data. Wrike offers an integration with Excel in the form of XLS import/export, but sometimes the ability to sync your Excel data with Wrike will be useful. Here comes Wrike’s open API, which allows integrations with other applications, and not only web-based ones.
From this post you’ll learn how to get Wrike data directly into Excel. Excel data can be stored and organized in your Excel database, and you will be able to refresh and sync it using the Power Query add-on and Wrike’s API. We’ll also go over the basics of Power Query and its usage in Microsoft apps, such as Excel and Power BI.
Wrike + Excel: How it Works in Technical Terms
Wrike’s API is a RESTful application, which allows you to make HTTP calls to obtain data. It may be used as source for your Excel database (or any other similar tool, which can be integrated with Excel).
MS Excel supports different types of external data sources, which you can read more about here. Recent Excel versions allow you to get data from online databases and other web sources (including the public resources) such as REST API’s (like Wrike's). However, the process of obtaining data from web APIs is not specified through the Excel UI, so I will try to explain how to do that with the help of the Power Query.
What is Power Query?
It’s an extension built on the M-language platform, which is used in MS Excel and Power BI. The M-language requires some additional training, but is easy to understand, especially if you’re already familiar with VBA or SQL.
The interaction with Power Query (PQ) in Excel is organized with the help of the Query Editor. PQ comes with the latest version of Excel (2016) on Windows or may be installed separately. Power Query is also part of Excel’s 2016 Get & Transform feature, which allows multiple actions with your data. You can read more about it here: Get and Transform.
Before You Start
- Read about Power Query
- Read about authorization in Wrike’s API
- Ensure that your MS Excel supports Power Query. If it doesn’t, install it as an add-on (Power BI Desktop has PQ included). Important: PQ is not available on Office for Mac currently.
Working with Query Editor in MS Excel
- Creating a New Data Source – Blank Query
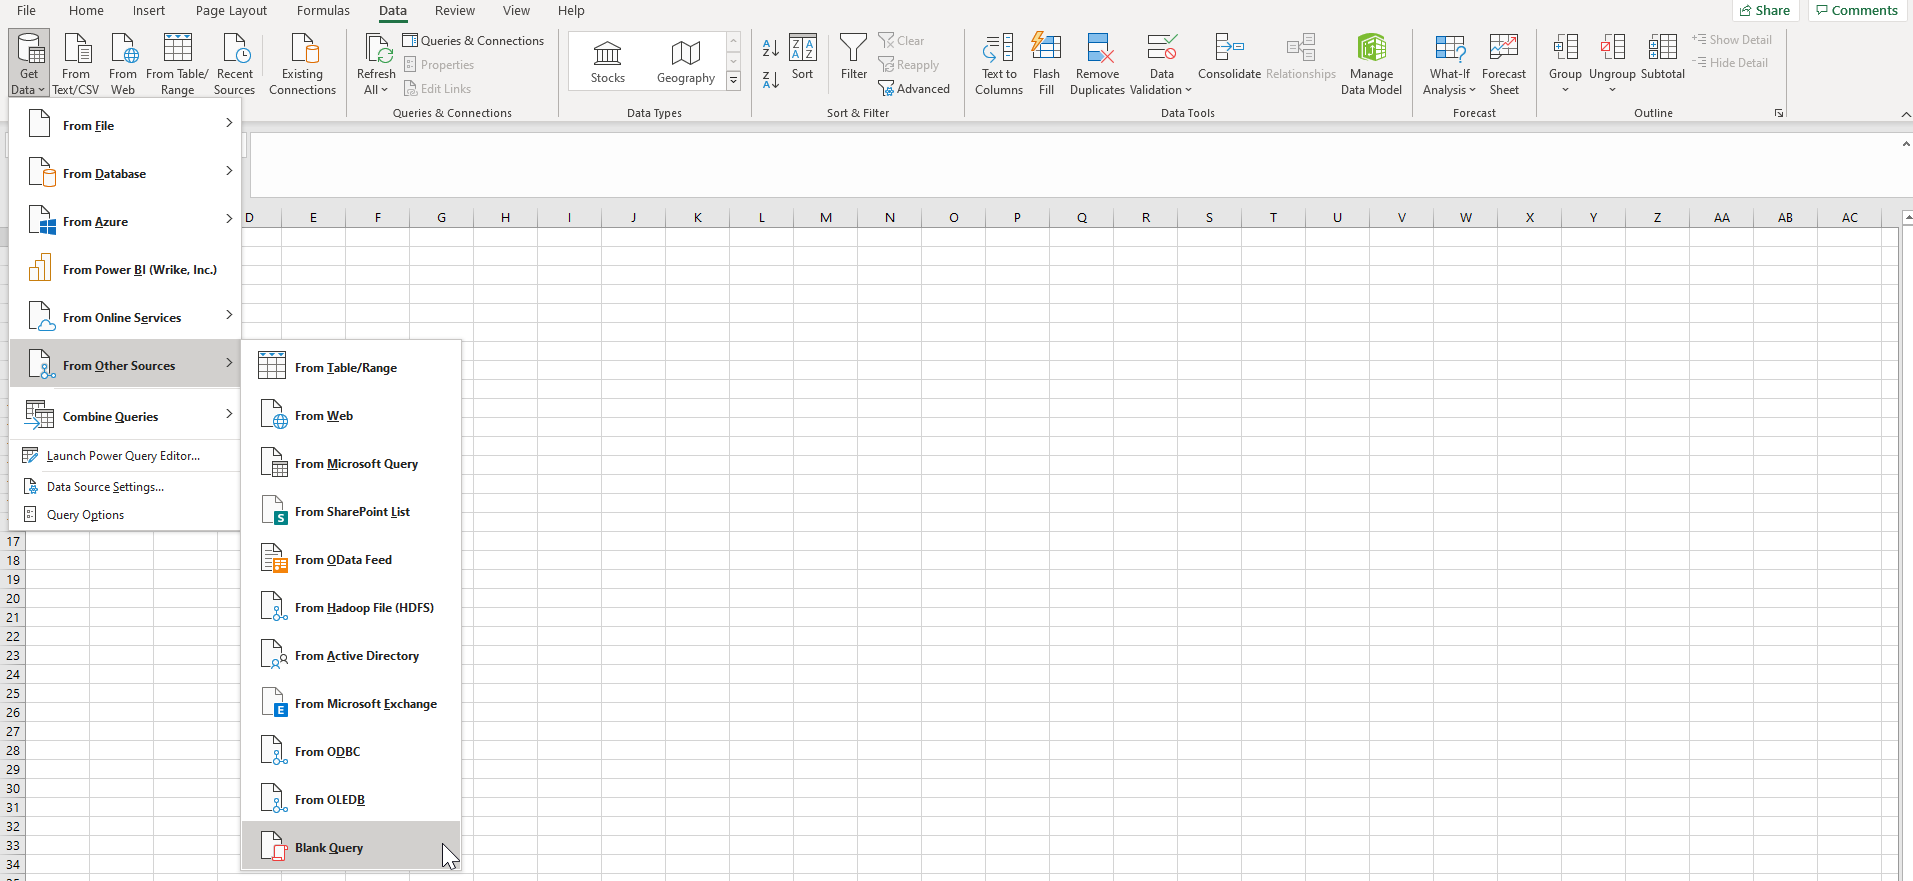
To use Power Query and Query Editor we must first add a new data source. Add a new data source from the ‘Data’ tab, ‘Get & Transform’ section. Select ‘New query’ on the ribbon, choose from ‘Other sources’ > ‘Blank query’. Once this is done, you will find yourself in the PowerQuery extension, which is normally launched in a separate window.
Please see the detailed description of Data sources on Microsoft’s Support portal.
- Understanding Query Editor
Power Query offers a wide range of functions (all of them are described in numerous tutorials if you want to learn more). Some functions are related to basic data transformation options, while others are focused on formulas (all summed up here).
With Query Editor actions that you take to modify the properties of a query, or of data received, are tracked in a list of applied steps. You can switch between these steps, undo changes, or add extra modifications. All changes are reflected in the PQ code (known as Power Query Formula Language, PQFL, formerly called M-language), which is accessible in Advanced Editor. All of your operations with data made from the UI are recorded on the code level as well, and can be modified at any point.
Advanced Query Editor: Building PowerQuery Code to Get Wrike Data
In order for our Excel query to work with Wrike’s API we need to use PQ’s Advanced Editor feature (learn how to use it in this MS Excel guide), which provides direct access to the PQFL code behind your query.
The main reason for using this feature is that we need to indicate HTTP headers (‘Authorization’ headers, to be specific), and pass them with the request to our API data endpoint. PQFL is a great tool for carrying out intricate operations, not pre-built in the Power Query UI. Read the full documentation on PQFL.
Before starting with the Advanced Editor we need to make sure we have a permanent access token, which can be obtained from the Dev console in Wrike. Please see our previous post, which explains more about the permanent token.
In our example we will get information on all Timelogs shared with the user, who is the bearer of the access token. We will use this method from Wrike’s API docs to get the correct endpoint.
Now that we have all of the necessary info, let’s take the final steps.
1. Open your Query in Advanced Editor
2. Paste this line of code into the Advanced Editor:
let
    Source = Web.Contents("https://www.wrike.com/api/v4/timelogs",
[Headers=[#"Authorization"="bearer <your_access_token>"]]),
convertToJson = Json.Document(Source)
in
    convertToJson
This triggers a simple HTTP GET call to the specified /timelogs endpoint with the additional ‘Authorization’ header and parses the JSON response received. Please don’t forget to substitute <your_access_token> with your permanent token.
3. Make sure to click ‘Done’ to close the Advanced Editor window and save changes to our query. Your query should be saved with ‘Source’ and ‘Imported JSON' actions in the ‘Applied steps’ section.
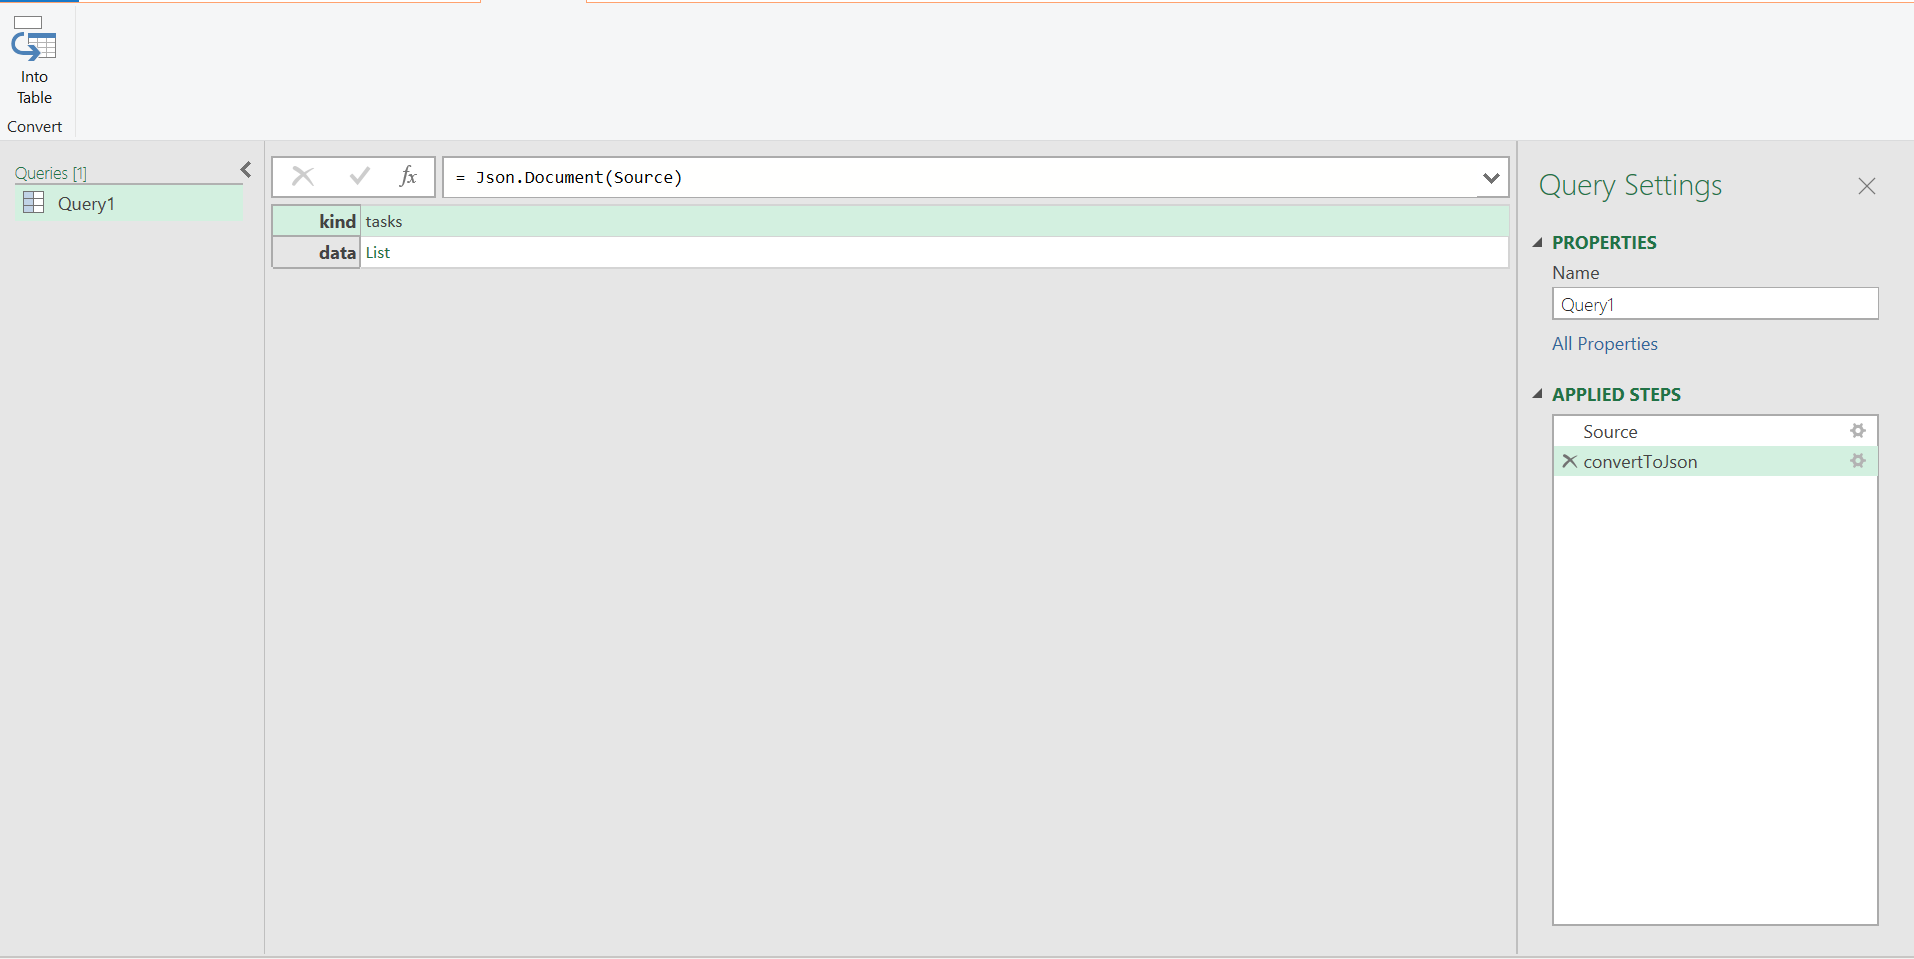
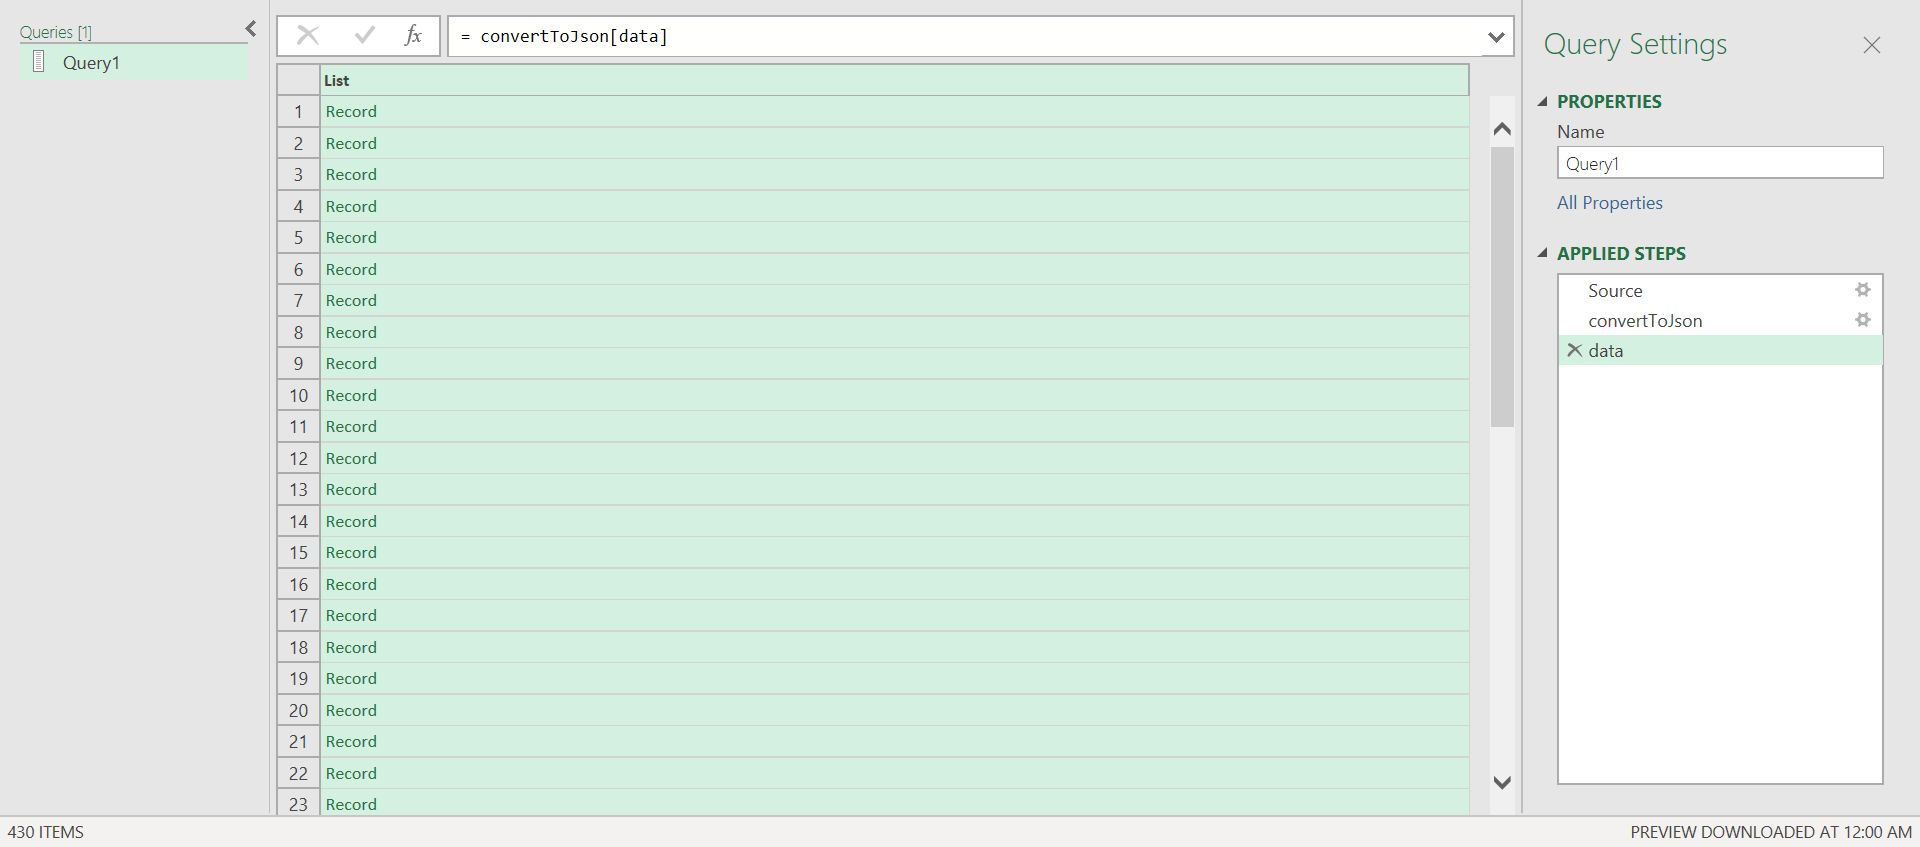
4. Once you close the Advanced Editor window you will see your query results parsed in 2 parts: 1) ‘kind’, which signifies the type of endpoint requested (timelogs) and 2) data, which represents a list of requested items. Click ‘List’ to get to the data records obtained from Wrike’s API (when you do this an additional step is added to the Applied steps).
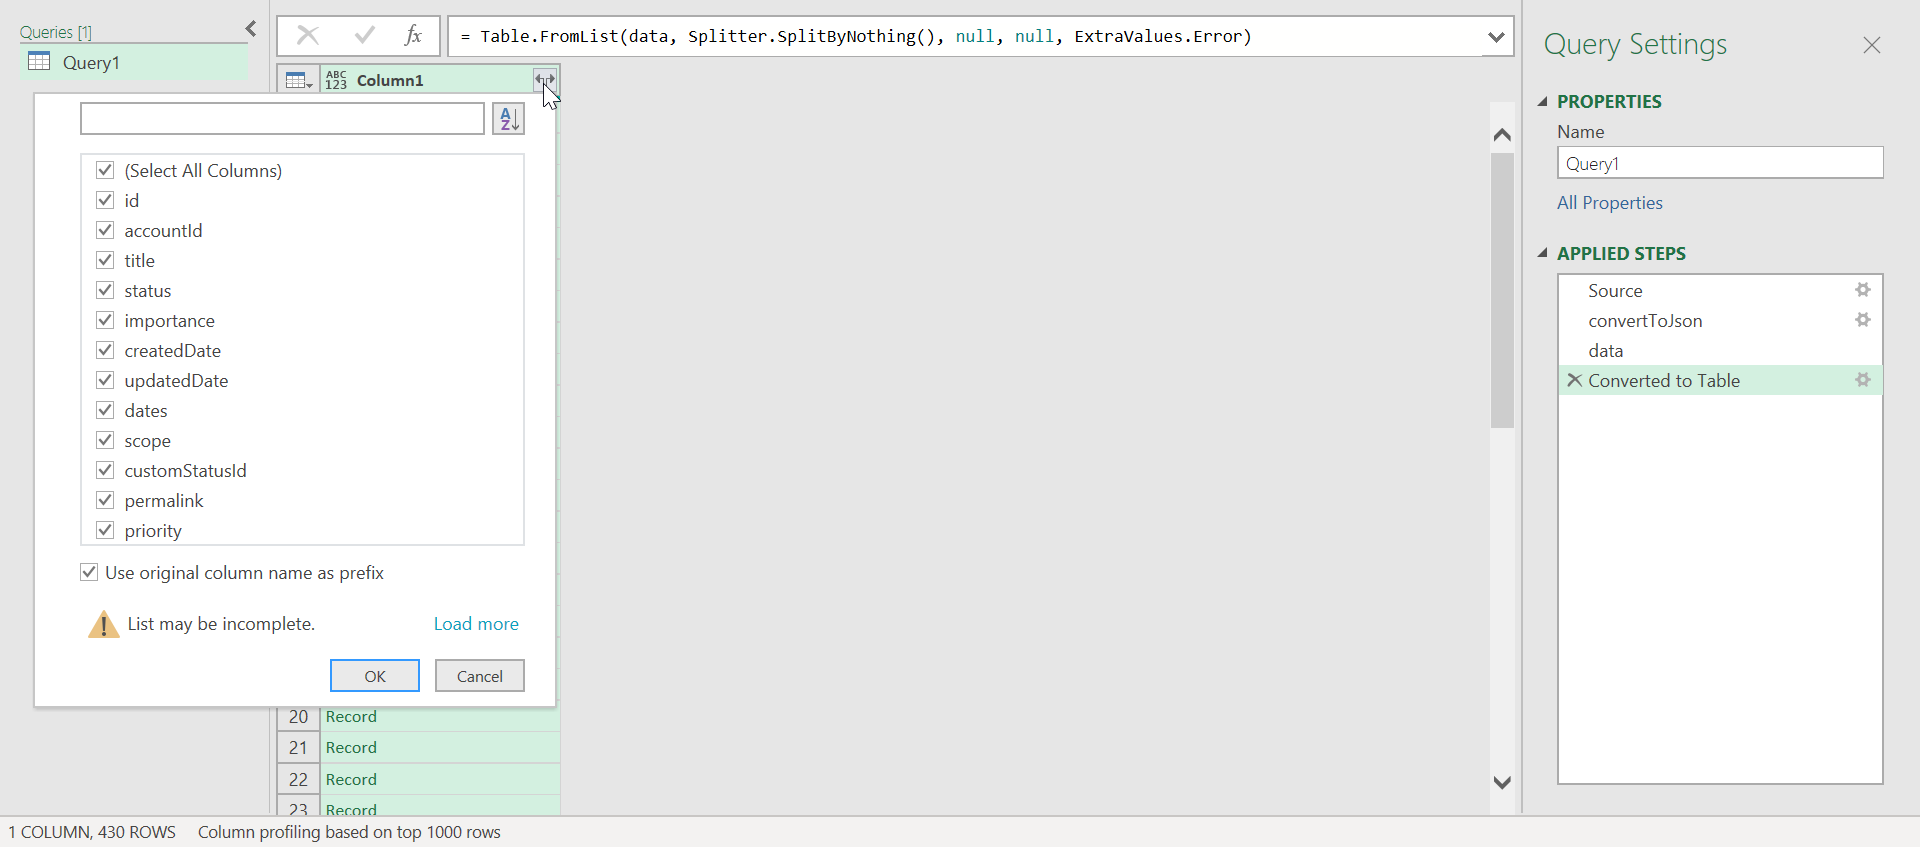
5. Use the ‘To Table’ button to convert parsed data into a table format and confirm your settings – I recommend leaving them as is (another step is added to Applied steps section). You will see all your data saved into a single ‘high-level’ column.
6. We are almost done with the preparatory steps – the last step is to expand your column into a multi-column table, with the column names taken from the parsed Wrike parameters. To do this, click the expansion button, select the needed columns and confirm.
7. Use ‘Close & Load’ button to get all the data loaded to Excel spreadsheet
Next steps: Working With Obtained Data
Excel is a great tool for working with data and Power Query itself offers multiple options, such as filtering, sorting, and merging data. I recommend to look through the PQ Guide to understand what it can do. The sections “Filter, sort, and group data” and “Shape data in a query” are particularly interesting.
There are couple more things I personally recommend studying, because I find them quite useful:
- PQ offers the ability to combine multiple queries and drill down to specific tables, you may read more about it on Microsoft’s pages: Combine Multiple Queries and Drill Down into a Related Table sections.
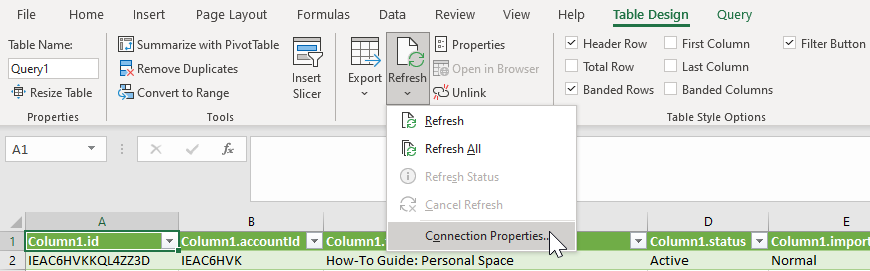
- Excel allows you to schedule data refresh on an automatic basis, you may find the controls on the ‘Design’ tab, ‘External Table Data’ section > ‘Refresh’ > ‘Connection properties’. This setting may help you keep your Query data up-to-date and it’s a great way to get changes from Wrike.
Miscellaneous: Constructing Complex Query with URL-encoded Parameters
In our example we walked through constructing a simple Query to Wrike’s API, which used a URL string where all parameters could be encoded. For instance, we could use ‘https://www.wrike.com/api/v4/folders?project=true’ URL to get a complete Project list .
But what if we need to get some complex parameters, for instance, to obtain the list of tasks with extra ‘fields’ parameters?
In this case the ‘Query’ option for ‘Web.Contents()’ function should help. We can use this piece of PQ Formula Language to get all the tasks shared with the user who got the token.
let
    Source = Web.Contents
(
"https://www.wrike.com/api/v4/tasks",
[
Query=[#"fields"="[sharedIds,dependencyIds,briefDescription,parentIds,superParentIds,
subTaskIds,responsibleIds,description,recurrent,authorIds,attachmentCount,hasAttachments,
customFields,superTaskIds,metadata]"],
Headers=[#"Authorization"="bearer <access_token>"]
]
),
convertToJson = Json.Document(Source)
in
convertToJson
Please, pay attention to the syntax of the ‘Query’ option, it’s similar to ‘Headers’, but the 2nd level parameters need to be passed in [] brackets.
Please note: the output limits of 1000 objects are applied when we use this method, please see this Community post for details.
Integration with other MS tools: MS Power BI and MS Access
MS Power BI is the new prominent Extract, Transform, Load (ETL) solution from Microsoft, which uses Power Query as the core module for working with data sources. Even though it has a great number of data-source presets to choose from (including Web API’s with the ability to specify HTTP request headers) I could not get it to work via these presets. It seems like like the standard form does not completely support the OAuth2 authorization flow.
However, Power BI has the same option of constructing your own Query, which was examined in this post, therefore, all things covered here are applicable to Power BI.
Considering that Power BI allows integrations with other data sources and provides nice modelling options, the space for experimenting is almost infinite! Excel gives an option to export to MS Access, which means you may use it as a ‘hub’ between your Wrike account and Access database. That’s not even taking into account that Microsoft is actively improving Power BI and Excel Power Query, adding more and more data-connect options.
I hope this post was helpful to Excel and Power BI fans, please feel free to ask any follow-up questions and share your own Power Query experience.