Your Wrike Workspace includes several building blocks, which allow you to set up a flexible work structure for your account. The key blocks: Folders, Projects, Subfolders and Subprojects, Tasks and Subtasks.
We often get asked about the key best practices on when to use these items, so let’s take a dive into each of them.
Folders and Subfolders
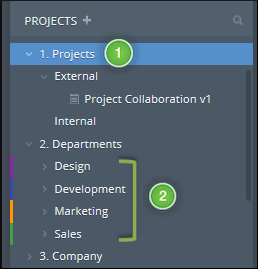
Folders are perfect for organization. They can be used to categorize anything in your Workspace: tasks, other Folders and Projects. Most account structures include top level Folders 1, which in turn contain all other Subfolders and Projects. In the example screenshot below, our top level Folders are:
- Projects - contains our company’s projects. To make it easier to find what you are looking for: break down the structure even further and add Subfolders based on the Project types you work on. Below, we grouped Projects by “External” and “Internal” categories. You can also group by Project Manager, Project Type, or any other groupings you use internally.
- Departments - organizes work by department. Additional Subfolders 2 are added for each department, and the teams working from these Folders can choose to create their own Folder/Project hierarchy within these containers.
- Company - stores all general company related tasks and Folders.
More ideas for when to use Folders:
- Store meeting notes
- Create Folder Tags
- Create a private Folder for managing your personal to-do list
Projects and Subprojects
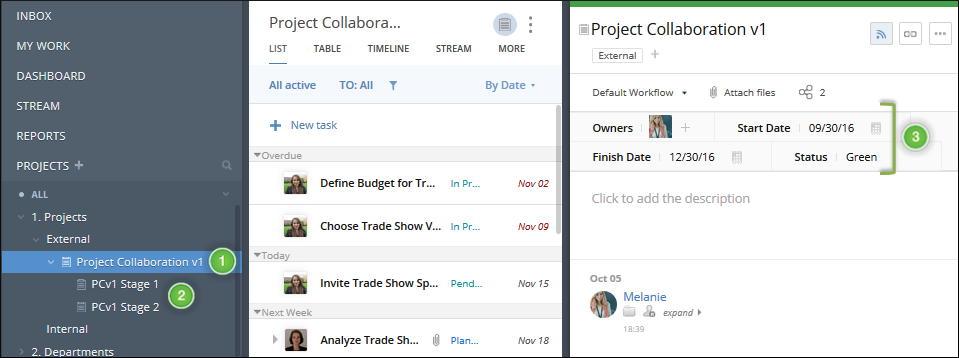
Projects 1 are meant to contain all the actionable steps you need to take to reach a certain goal. These aren't actionable items, but they are perfect for housing them. Some great use-cases for Projects: trade shows, feature releases, renovation projects, and any other goal which requires multiple steps. Using Subprojects allows you to break down larger Projects into phases 2 or categories. Another difference between Folders and Projects is that the latter have additional attributes 3, such as:
- Start and Finish dates
- Owners
- Status
Quick Tip: If multiple teams/departments are working on the same Project, you can use Folder Tags to categorize the tasks. Doing this makes the tasks accessible from both the team Folder and from the shared Project.
Tasks and Subtasks
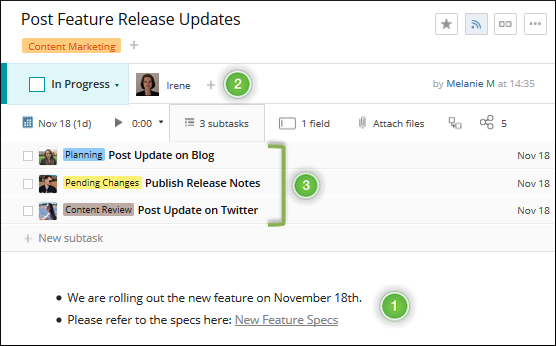
Tasks and subtasks are the action items in your Workspace; this is where work gets done. You can add a detailed description 1 and attachments to provide relevant information about the task, as well as fill out other attributes 2:
- Assignee
- Start and due dates
- Status
If there's one action item that's made up of various smaller action items, you can use a task for the main action, and subtasks 3 for the supporting items. This allows you to set different dates and assignees for task microsteps. Here are some best practices for choosing between a task and subtask:
- If a task includes several microsteps which can be completed without adding additional information to Wrike, try creating checklists for these items in a task’s description field.
- If a parent task includes steps which can be executed at the same time (but which don’t rely on each other) you can create subtasks for these steps, while keeping the parent task description empty. The task itself acts as a base to structure its components. Information about progress and updates can be tracked in the subtasks.
- If all subtasks rely on the same information, try to include the details in the parent task. Users can easily click on the parent task name (right above the subtask title in the Task View) to view details needed for completing their part of the job. Subtasks can be used to record detailed information, while only results or summaries are carried out to the parent task.